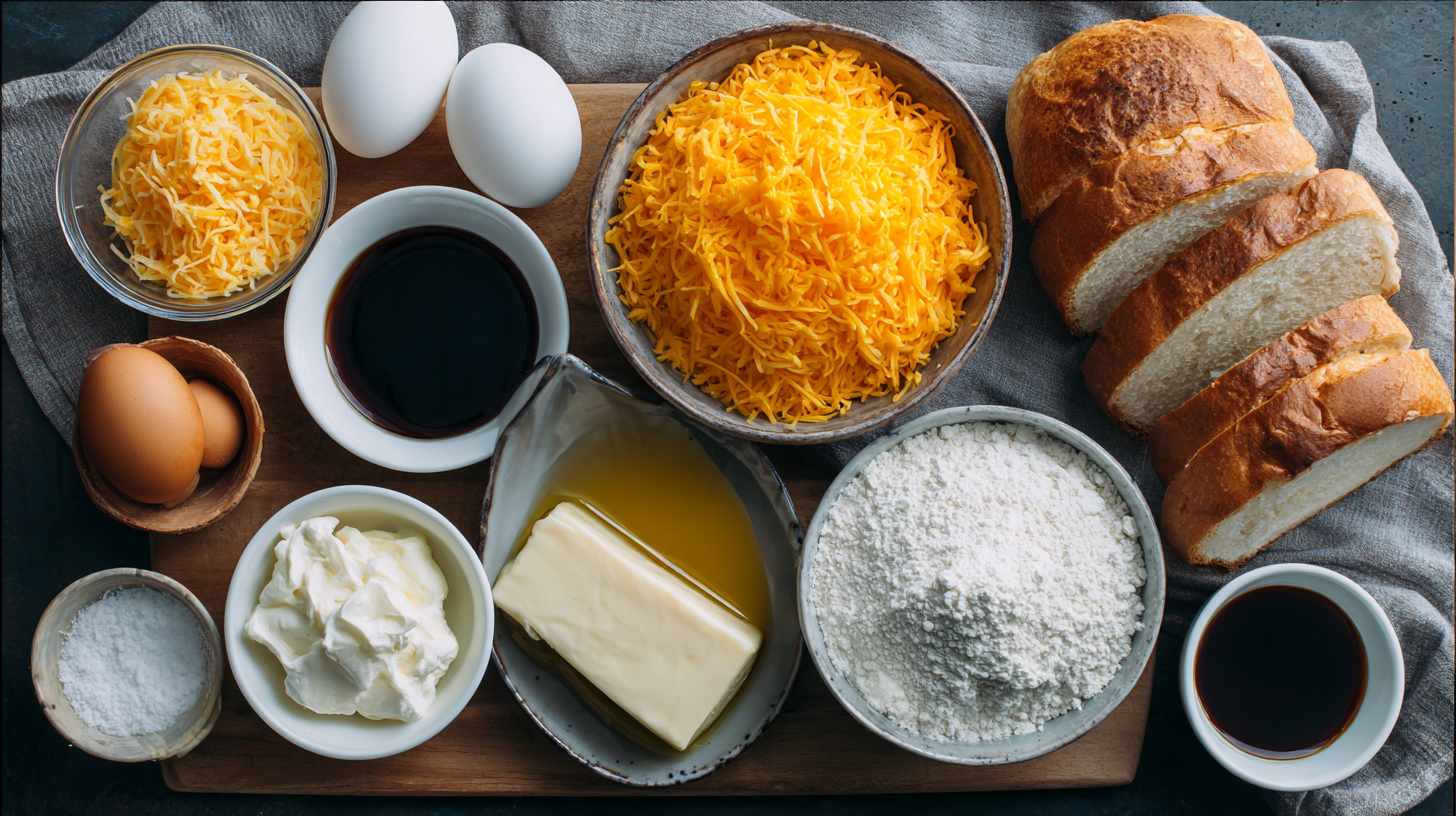
In this post, we’re diving into the irresistible world of Cheese Dreams, a nostalgic Southern-style snack that’s part grilled cheese, part cozy memory—perfect for game nights, cozy dinners, or anytime you’re craving something rich and comforting. We’ll walk through the story behind this dish, uncover chef-approved ingredient tips, and share step-by-step instructions so you can recreate them in your kitchen. You’ll learn how to add variations like bacon or tomato, discover easy storage hacks, and get answers to common FAQs. Let’s make these cheesy, buttery bites together!

Table of Contents
The Classic Cheese Dreams
Sharing my first memory of Cheese Dreams feels like yesterday. I was eight and watching my grandmother in her warm kitchen as crunchy bread squares emerged from the oven, topped with gooey cheddar and the faint tang of Worcestershire sauce. That moment was pure comfort—and it sparked a lifelong love of Cheese Dreams recipe. Imagine biting into that crispy shell and letting that cheesy filling melt on your tongue. The Cheese Dreams recipe takes those memories and elevates them with sharp cheddar, creamy butter, and just a touch of dry mustard.
This Cheese Dreams recipe balances nostalgia and freshness. Using freshly grated sharp cheddar gives more powerful flavor than pre-shredded cheese. The butter blends seamlessly with the egg and heavy cream to create a spreadable mixture that’s rich yet light. Worcestershire sauce and dry mustard add a subtle kick. Spread it thick on hearty white bread, bake until golden brown, and voilà—you’ve got the iconic Cheese Dreams.
Ingredients that elevate your Cheese Dreams
Cheese Dreams recipe shines with quality ingredients. Choose a block of sharp cheddar and grate it yourself—it melts beautifully and gives bold flavor. Room-temperature unsalted butter blends evenly for a silky texture. Heavy cream and a large egg help bind the mix while keeping it moist. A hint of Worcestershire sauce, dry mustard, and ground red pepper add depth and complexity.
Bread and assembly tips
Use firm white sandwich bread that won’t get soggy when topped. Cut off the crusts and halve the slices to create small, even squares. Spread about a teaspoon of the cheese mixture on half the bread, top with another piece to make a mini sandwich, then “frost” the outside with more mixture. This layering ensures each bite is cheesy goodness. Spread them on a baking sheet, leaving space between each, and you’re ready for Part 2, where we’ll cover baking times, variations like bacon and tomato, and those clever freezer hacks

Baking & Irresistible Variations
Once your baked cheese dreams are assembled, get ready to bring them to life in the oven! Preheat your oven to 350°F (175°C), then line a baking sheet with parchment paper. Arrange the sandwiches evenly and bake for 12–15 minutes, or until they’re golden on the edges and the cheese is hot and bubbly on top—absolutely irresistible.
Once your Cheese Dreams are assembled, it’s time to bake them to golden perfection. Preheat your oven to 350°F (175°C) and place the little sandwiches on a parchment-lined baking sheet. Bake for about 12–15 minutes until the edges are crisp and the tops are bubbling with cheese. Watch closely; you want that ideal crispy exterior with a gooey center—classic baked cheese dreams.
Switching it up? These baked cheese dreams are super versatile. Want to add bacon? Cook and crumble 4–6 strips of thick-cut bacon, then mix half into the cheese spread and sprinkle the rest on top before baking. Craving tomato? Thinly slice a fresh Roma tomato and place one slice inside each sandwich before baking—just make sure to pat it dry to avoid sogginess.
Subheading: Perfect oven timing for baked cheese dreams
Oven temperature matters. At 350°F, you’ll achieve a crisp exterior without burning the cheese. Rotate the tray halfway through so each dream browns evenly. If tops aren’t bubbling by the 10-minute mark, switch to broil for the last 1–2 minutes—just watch carefully to prevent burning.
Subheading: Creative twists beyond the classic
Besides bacon and tomato, try these variations: swap sharp cheddar for pepper jack and toss in jalapeño slices for a spicy twist. Or, stir in a teaspoon of minced fresh herbs like chives or thyme. You can even make mini open-faced versions—skip the top bread slice and bake until just golden.
“Looking to meal prep like a pro? These Baked Cottage Cheese Eggs also store well, making them a perfect inspiration for frozen Cheese Dreams success.”
Freezing & Storage Hacks
Want to enjoy Cheese Dreams later? Freezing them is a great way to keep that cheesy goodness ready anytime. Start by assembling your mini sandwiches as usual, but don’t bake them before freezing—that gives the best texture when reheated. Layer them in a single layer on a baking sheet and freeze for about 1 hour until firm. Then, stack them with parchment paper between each and transfer to a zip-top freezer bag, pressing out excess air to avoid freezer burn.
When you’re ready, skip thawing and bake them straight from frozen at 350°F (175°C). Expect a few extra minutes—about 18–20 total—to ensure they’re heated through. This method locks in flavor and texture so your Cheese Dreams always taste fresh, hot, and crisp.
Storing baked and unfrozen Cheese Dreams
If you prefer baking now and enjoying later, store cooled Cheese Dreams in an airtight container. These baked cheese dreams store beautifully—just pop them in an airtight container and refrigerate for up to 3 days. When you’re ready to enjoy them, a quick reheat brings back their melty, cheesy magic.
. To reheat, pop them into a toaster oven or conventional oven at 325°F (165°C) for about 5 minutes—this brings back that crisp exterior.
Maximizing freezer storage life
Cheese Dreams freezer storage works best when stored properly. With parchment between each sandwich and minimal air in the bag, they’ll stay tasty for up to 1 month. Label your bags with dates to keep track. When reheating from frozen, consider tenting aluminum foil over the tray after 15 minutes if the tops are browning too quickly—this ensures fully melted insides without burnt outsides.

Serving & Flavor Enhancements
When your Cheese Dreams come out of the oven, serve them warm and fresh—that crispy shell and gooey cheese center shine best hot. Arrange them on a platter with fresh parsley or chives for color and texture. These serving cheese dreams are perfect for casual dinners, snack platters, or even brunch gatherings.
Pair them with simple sides—think tomato soup, crisp green salads, or roasted veggies—for a balanced meal. For a cozy indulgence, serve with a small bowl of marinara sauce or ranch for dipping. The key is contrast: crunchy exterior, melty interior, and a tangy dip to complement the richness.
Plating presentation tips for serving cheese dreams
Think visually: stagger them on a wooden board and add bright garnishes like cherry tomatoes or microgreens Use small ramekins to serve your dips and elevate the presentation with edible flowers or a sprinkle of vibrant herbs. These thoughtful details turn an ordinary snack into a gourmet experience your guests won’t forget.
Flavor boosters & dipping sauces
While cheese dreams are already a treat on their own, a few simple upgrades can make them unforgettable. Sprinkle extra Parmesan on top before baking for a rich, nutty crisp that adds irresistible texture and flavor. Mix a teaspoon of smoked paprika or cayenne into the cheese spread for depth and warmth. For dipping, try honey mustard, garlic aioli, or spicy buffalo ranch. Our ultimate dipping sauce guide has several pairing ideas to try.
“For more melty magic, check out our Grilled Cheese Burrito—another brilliant baked idea for cheese lovers.”
FAQ
How to make cheesy dreams?
Whisk together grated sharp cheddar, room-temperature butter, an egg, heavy cream, Worcestershire sauce, and dry mustard. Spread on white bread squares, bake at 350°F until golden and bubbly.
What is cheese dream?
A nostalgic Southern-style mini grilled-cheese sandwich—bread spread with a rich, cheesy mixture, baked until crispy on the outside and melty inside.
How do you make easy cheese dreams with bacon?
Stir cooked, crumbled bacon into half the cheese spread, layer a sprinkle on top before baking, then bake as usual at 350°F.
How do I store cheese dreams for optimal freshness?
Let them cool completely, then store in an airtight container in the fridge for up to 3 days. When you’re ready to enjoy again, simply reheat at 325°F until warm and melty. For longer storage, freeze uncooked dreams in a single layer with parchment between, in freezer bag for up to 1 month. Bake from frozen at 350°F for 18–20 minutes.
Conclusion
From nostalgic roots to mouthwatering variations, smart prep tips, and elegant presentation ideas, Cheese Dreams blend comfort with creativity in every bite. Whether you’re baking up a fresh batch or reheating from the freezer, this guide has you covered. So grab your ingredients, preheat that oven, and let’s fill your kitchen with the cozy, cheesy goodness we all crave. Let’s make magic—one melty bite at a time.
PrintCheese Dreams Recipe: Crispy, Cheesy Southern Bites to Love
Crispy, golden, and irresistibly cheesy, these Southern-style Cheese Dreams are the ultimate nostalgic snack. Perfect for brunches, gatherings, or a cozy night in, each bite is buttery, melty, and packed with bold cheddar flavor.
- Prep Time: 10 mins
- Cook Time: 15 minutes
- Total Time: 25 mins
- Yield: 16 pieces
- Category: Appetizer
- Method: Baked
- Cuisine: Southern
Ingredients
2 cups sharp cheddar cheese, grated
1 large egg
2 tbsp heavy cream
4 tbsp unsalted butter, softened
1 tsp Worcestershire sauce
1/2 tsp dry mustard
1/8 tsp ground red pepper
8 slices white sandwich bread (crusts removed)
Optional: 4 strips bacon, cooked and crumbled
Optional: 1 Roma tomato, thinly sliced
Instructions
1. Preheat oven to 350°F (175°C) and line a baking sheet with parchment.
2. In a bowl, combine cheese, egg, cream, butter, Worcestershire sauce, mustard, and red pepper.
3. If using, stir in half the bacon.
4. Cut crusts from bread and slice each piece in half to form rectangles.
5. Spread 1 tsp of cheese mixture on each slice.
6. (Optional: place tomato slice inside sandwich).
7. Top with another slice to form a sandwich.
8. Spread more cheese mixture on top of each sandwich.
9. Place sandwiches on baking sheet, leaving space between each.
10. Bake for 12–15 minutes until tops are bubbly and edges golden.
11. (Optional: broil for 1–2 minutes for extra crispness).
Notes
To freeze: assemble but do not bake. Freeze on a tray, then transfer to a freezer bag. Bake from frozen at 350°F for 18–20 mins.
Store leftovers in fridge up to 3 days; reheat at 325°F for 5 mins.
Try variations with bacon, tomato, or pepper jack cheese.
Nutrition
- Serving Size: 2 pieces recipes
- Calories: 190
- Sugar: 0.6g
- Sodium: 280mg
- Fat: 14g
- Saturated Fat: 8g
- Unsaturated Fat: 5g
- Trans Fat: 0g
- Carbohydrates: 10g
- Fiber: 0.4g
- Protein: 7g
- Cholesterol: 45mg

