
Who doesn’t love garlic bread? It’s the perfect companion to pasta, soups, or even as a stand-alone snack. But let’s face it, baking garlic bread in a conventional oven can take forever. Enter the air fryer—a game-changer in the kitchen! It’s fast, energy-efficient, and delivers garlic bread that’s crispy on the outside and soft on the inside.
In this guide, we’ll walk you through everything you need to know about making air fryer garlic bread. From why the air fryer is the perfect tool for the job to step-by-step recipes, tips on creative variations, and FAQs, we’ve got you covered. Let’s dive in!
Table of Contents
Why Air Fry Garlic Bread?
What Makes Air Fryer Garlic Bread Special?
If you’re new to using an air fryer, you might wonder why it’s so great for making garlic bread. The answer is simple: speed and consistency. An air fryer circulates hot air rapidly, creating a perfectly even cook. This means your garlic bread will have that crave-worthy golden crust without the risk of burning or undercooking. Plus, no need to preheat a giant oven!
What’s more, air fryer garlic bread comes out just right every single time. The edges get crispy while the inside stays buttery and tender. No soggy bottoms here! It’s also incredibly quick—most recipes take less than 10 minutes from start to finish.
Healthier Than Traditional Methods
Let’s be honest: garlic bread isn’t exactly a health food. But making it in an air fryer can make it slightly less indulgent. The air fryer uses minimal oil compared to traditional baking methods, which can help cut calories while still preserving flavor.
Using an air fryer also eliminates the need for unnecessary butter or oil sprays to keep the bread from sticking to pans. The result? A healthier, more satisfying version of your favorite comfort food.
In short, the air fryer lets you enjoy garlic bread that’s not just delicious but also lighter and quicker to make. If you’re looking for a faster, healthier, and more consistent way to whip up this classic side dish, the air fryer is your new best friend.

Ingredients You’ll Need
Essential Ingredients for Garlic Bread
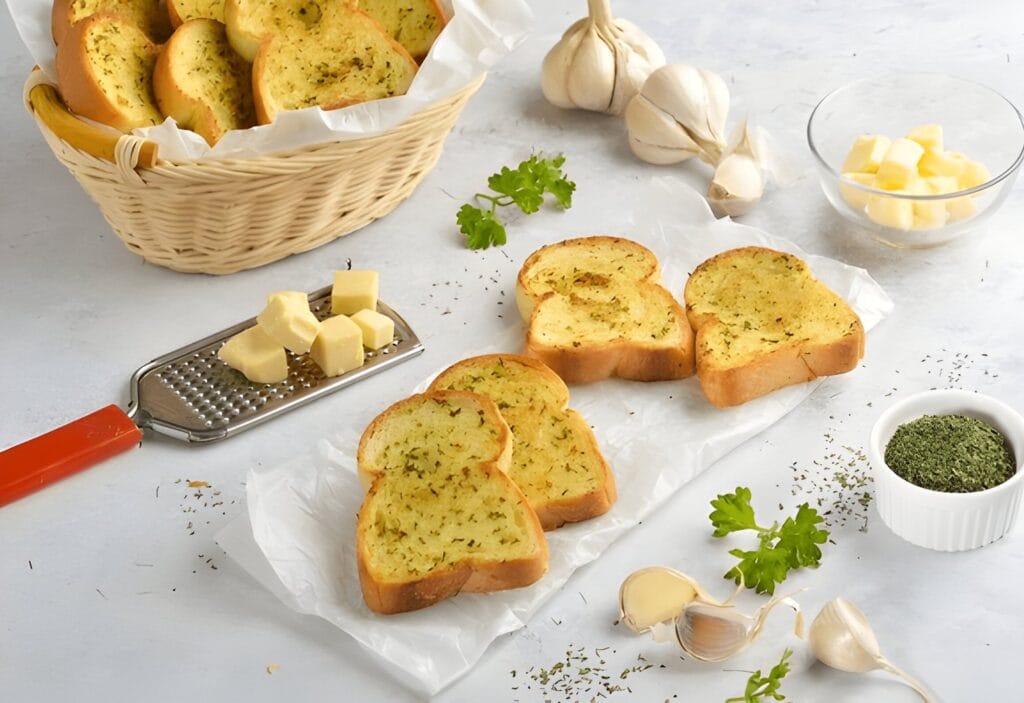
Making the perfect air fryer garlic bread starts with the right ingredients. At its core, garlic bread is simple, but quality ingredients make all the difference. Here’s what you’ll need:
- Bread: French baguettes, ciabatta, or sourdough are ideal. They hold their shape well and crisp up beautifully.
- Butter: Go for unsalted butter so you can control the saltiness of the garlic spread. Let it soften for easy mixing.
- Garlic: Freshly minced garlic cloves deliver the best flavor, but garlic powder works in a pinch.
- Parsley: Fresh parsley adds a pop of color and flavor, elevating the taste.
Optional Add-Ons for Extra Flavor
Want to take your garlic bread up a notch? Add some of these ingredients for a gourmet touch:
- Cheese: A sprinkle of mozzarella or Parmesan will give your garlic bread a rich, cheesy twist.
- Herbs: Try oregano or rosemary for an herby kick.
- Chili Flakes: For spice lovers, a pinch of red chili flakes adds heat and flavor.
💡 Looking for more inspiration? Check out this Garlic Parmesan Chicken Pasta recipe for more ways to enjoy garlic and Parmesan together!

Step-by-Step Recipe for Air Fryer Garlic Bread
Preparation Tips
Before diving into the recipe, a little prep goes a long way. Choose a sturdy bread like ciabatta, as it won’t get soggy under the buttery garlic spread. If you’re using frozen bread, let it thaw completely. Softened butter mixes easier with garlic, so let it sit at room temperature for about 20 minutes.
How to Assemble Your Garlic Bread
- Prepare the Garlic Spread: In a bowl, combine softened butter, minced garlic, chopped parsley, and a pinch of salt. If you want to get fancy, toss in a handful of grated Parmesan cheese.
- Spread Evenly: Cut the bread into thick slices or halves. Spread the garlic butter evenly across the surface, ensuring full coverage for maximum flavor.
Cooking Instructions
- Preheat the Air Fryer: Preheating ensures even cooking. Set your air fryer to 350°F (175°C) and let it run for 2–3 minutes.
- Arrange the Bread: Place the slices in the air fryer basket. Avoid overcrowding—leave some space for air circulation.
- Cook: Air fry for 5–7 minutes, or until the edges are golden brown and crispy. Keep an eye on it to avoid burning.
Variations and Creative Twists
Cheesy Garlic Bread in the Air Fryer
If you’re a fan of all things cheesy, then you’ll love this variation of air fryer garlic bread. To make it, follow the basic recipe but sprinkle shredded mozzarella, cheddar, or a blend of both on top of the garlic butter spread before cooking. Parmesan can also be added for an extra layer of flavor.
For the best results, add the cheese during the last 2–3 minutes of cooking to avoid over-browning or burning. When done, the cheese will be gooey, golden, and absolutely irresistible. Pair it with marinara sauce for dipping—it’s a match made in heaven!
Vegan Garlic Bread Options
Looking for a plant-based twist? It’s super easy to make vegan garlic bread using simple swaps. Replace butter with vegan alternatives like coconut oil, margarine, or a plant-based butter spread. Fresh garlic and parsley stay the same, and you can even add nutritional yeast for a cheesy flavor without dairy.
To make the bread extra crispy, consider brushing it lightly with olive oil before air frying. This ensures a crunchy exterior while keeping the garlic spread soft and flavorful.
Spicy and Herb-Infused Garlic Bread
For a bold, flavorful variation, try spicing things up! Adding red chili flakes to your garlic butter mixture is a quick way to infuse heat. If you prefer herbs, rosemary and thyme provide a fragrant, earthy flavor that pairs perfectly with the crispness of air fryer garlic bread.
These variations are simple to make and add a unique twist to this classic snack. For more creative bread recipes, check out Cheese Dreams Recipe for a sweet take on homemade bread.
Common Mistakes and How to Avoid Them
Overcooking or Burning
One of the most common issues when making air fryer garlic bread is overcooking. Because air fryers heat up so quickly, it’s easy to leave the bread in for too long. To avoid this, always monitor your garlic bread during the last 1–2 minutes of cooking. The ideal color is golden brown—not dark brown or blackened.
If your air fryer tends to cook unevenly, consider flipping the slices halfway through. This will ensure both sides are evenly cooked and crispy.
Using Too Much or Too Little Butter
Finding the right balance of butter is key to perfect air fryer garlic bread. Too little, and the bread will taste dry and bland. Too much, and it might turn soggy or greasy. Stick to about one tablespoon of butter per slice, adjusting based on the size of your bread.
If you’re unsure, start with a smaller amount and add more as needed. The goal is to coat the bread evenly without drenching it.
Not Preheating the Air Fryer
Skipping the preheating step is a rookie mistake. A cold air fryer often results in unevenly cooked garlic bread. Preheat your air fryer for 2–3 minutes before placing the bread inside. This simple step makes a big difference in achieving a perfectly crispy texture.
Avoiding these common pitfalls ensures your garlic bread will be consistently delicious. For more tips and tricks, explore our Frozen Salmon in Air Fryer guide, packed with advice on getting the best results from your air fryer.
Serving and Storing Garlic Bread
The Best Pairings for Garlic Bread
Air fryer garlic bread is more than just a side dish—it’s a versatile crowd-pleaser that complements countless meals. For an Italian-inspired dinner, serve it alongside creamy fettuccine Alfredo or a classic spaghetti Bolognese. Its crispy edges and buttery, garlicky flavor also make it the perfect partner for hearty soups like tomato bisque or broccoli cheddar.
Looking for a lighter option? Pair it with a fresh Caesar or Greek salad to balance the richness of the bread. And don’t forget, garlic bread is a fantastic appetizer for parties. Serve it with dips like marinara, hummus, or even spinach and artichoke dip for an easy, satisfying starter.
Storage Tips
Got leftovers? Don’t worry—garlic bread can be just as good the next day if stored properly. Wrap any uneaten bread in aluminum foil or store it in an airtight container. Refrigerate it for up to 3 days.
When reheating, use your air fryer for the best results. Set it to 300°F (150°C) and heat for 2–3 minutes. Avoid using a microwave, as it can make the bread soggy. If you made too much, freeze the extra slices for up to a month and reheat directly from frozen when needed.
FAQs About Air Fryer Garlic Bread
Can I Use Any Type of Bread for Garlic Bread?
Absolutely! While French baguette and ciabatta are popular choices due to their texture, almost any bread works. Sourdough adds a tangy flavor, while sandwich bread creates a softer version. Just ensure the bread is sturdy enough to hold the garlic butter spread.
How Do I Prevent Garlic Bread From Getting Soggy?
The secret to avoiding soggy garlic bread lies in the cooking method. Use a light hand when applying butter—don’t drench the bread. Also, make sure your air fryer is preheated for even cooking. Avoid stacking slices, as this can trap moisture and affect the crispiness.
What’s the Best Way to Reheat Garlic Bread in an Air Fryer?
To restore the crisp texture, reheat your garlic bread in the air fryer at 300°F (150°C) for 2–3 minutes. This method keeps it from becoming rubbery or soggy, unlike microwaving. For frozen slices, increase the time to 5–6 minutes.
How Do I Make Gluten-Free Garlic Bread?
Making gluten-free garlic bread is simple! Replace regular bread with a gluten-free alternative. Many gluten-free loaves work just as well in the air fryer. Top it with the same garlic butter mixture, and you’ve got yourself a delicious gluten-free treat.
Conclusion
Air fryer garlic bread is a quick, easy, and versatile recipe that belongs in every home cook’s arsenal. Whether you’re serving it as a side dish for a cozy family dinner or as an appetizer for a crowd, this crispy, buttery treat is guaranteed to impress. With endless variations—from cheesy and spicy to vegan-friendly—you can tailor it to suit any occasion or dietary preference.
The air fryer simplifies the process, giving you perfectly crisp garlic bread in minutes without the hassle of preheating a full oven. By avoiding common pitfalls like overcooking or uneven butter application, you’ll enjoy consistently delicious results every time.
Ready to take your garlic bread game to the next level? Get creative with toppings, explore flavor combinations, and don’t forget to pair it with your favorite soups, pastas, or dips for a complete meal experience. With this guide, you’re well on your way to mastering the art of making air fryer garlic bread.
For more exciting recipes, tips, and ideas, explore our website and discover the joys of quick and easy cooking with the air fryer. Bon appétit!